CloudJiffy Auto Configurations for PHP App Servers
CloudJiffy dynamic resources organization complements the basic PHP one in order to bring the maximum efficiency for PHP integration into the Cloud. Upon changing the amount of allocated resources for the environment (i.e. cloudlet amount), CloudJiffy will automatically adjust the corresponding PHP module’s directives to suit the new conditions. Here with, you still have the possibility to configure these autoscalable parameters manually, within the server’s configuration file.
The type of basic requests’ handling and dispatching system varies for different PHP application servers, so the directives they use are different too, though the functionality of such parameters could be similar. To learn more about these directives for a particular application server, navigate to the corresponding section below:
- Apache
- NGINX-PHP
Besides that, you can learn How the Auto Configuration Works or, if you want to redefine the values for the described below parameters with your own, proceed to : How to Disable the Automatic CloudJiffy Optimization section of this guide.
Apache Auto Adjustable Settings
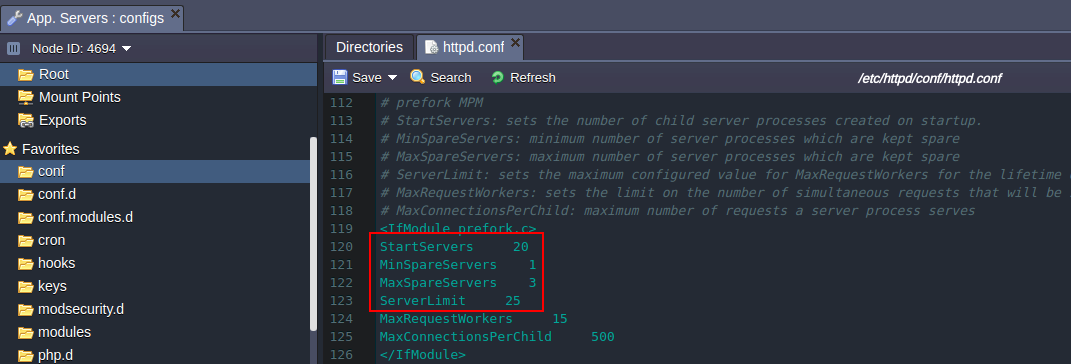
Dynamic requests handling in Apache is implemented with the help of the prefork Multi-Processing Module (MPM), which helps to fully reveal server potential at the Cloud. The MPM directives used are stored in the main Apache configuration file - httpd.conf, which is located in the conf folder.
Here is a complete list of parameters, which are configured by CloudJiffy automatically, based on the amount of allocated resources:
-
StartServers parameter sets the number of child processes, that should be initiated at a server’s startup.
 If you’d like to state your custom value, note: The amount of child processes depends on the load and is not bounded to their initial number, set by the current parameter. So there is usually little reason to adjust it.
 -
ServerLimit - this parameter sets the maximum possible value of the MaxClients directive (see its description below) for the lifetime of the server. If you try to state the MaxClients parameter higher than this limit, it will be dropped down to the ServerLimit value.
 If you’d like to state the custom value, note: stating ServerLimit to a value, that is much higher than necessary, will cause allocation of the extra, unused shared memory, while stating it too low won’t reveal the full server performance potential.
Within the CloudJiffy implementation, values for the above described settings are calculated automatically, based on the maximum amount of available resources (dynamic cloudlets). Below, you can find the table with these parameters’ default values for a few main environment RAM levels:
| Directive | Dynamic cloudlets (RAM) | ||
|---|---|---|---|
| 8 (1 Gb) | 16 (2 Gb) | 32 (4 Gb) | |
| ServerLimit | 12 | 25 | 51 |
| StartServers | 10 | 20 | 40 |
You may also be interested in How the Auto Configuration Works or how to Disable the Automatic CloudJiffy Optimization, in order to set the custom values for these directives.
How the PHP Auto Configuration Works
You can check how the abovementioned parameters are changed, depending on the amount of resources you set. The process is almost the same for both application servers, so let’s consider it on the example of Apache:
1. Create a new PHP environment with the Apache application server inside (if you don’t have one).
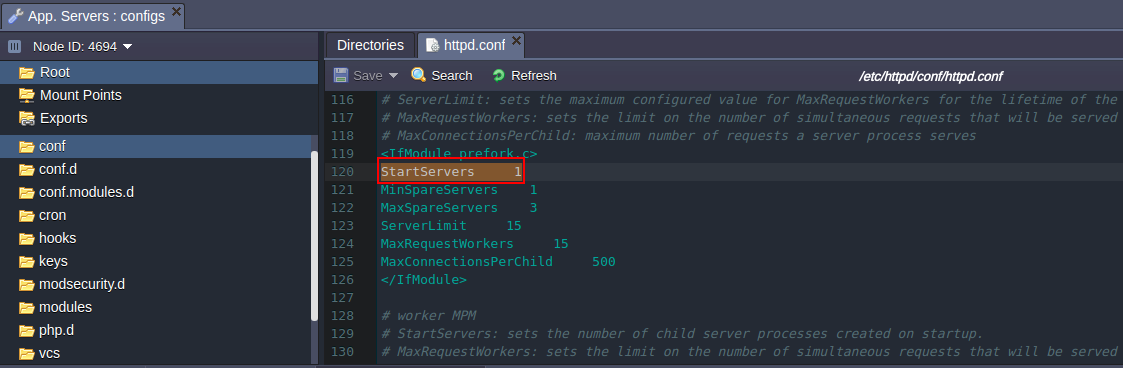
Then, click the Config button for this node and find the conf > httpd.conf file through the opened tab.

Scroll down approximately to the 100th line and remember the values of the directives, used for CloudJiffy automatic optimization (circled in the image above), and the maximum scaling limit for the server (i.e. dynamic cloudlets number, can be seen in the Usagedashboard column, 16 in our case).
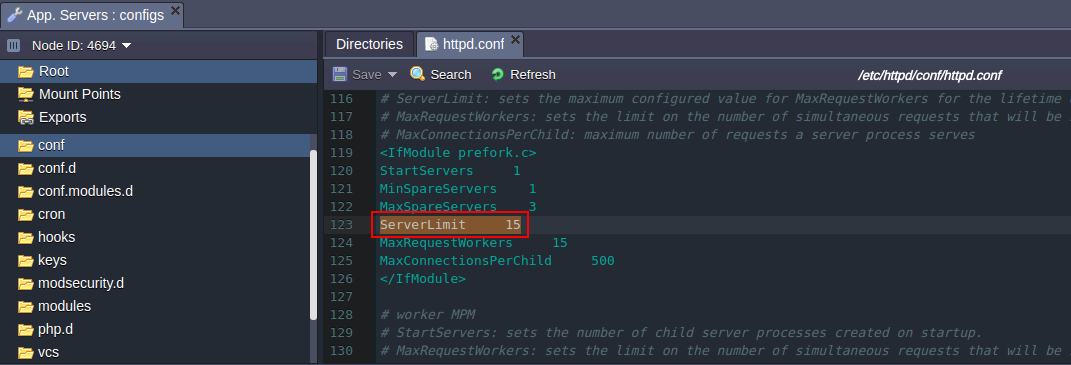
2. Now, with the help of the same-named button, access the Change environment topology wizard and set some another amount of resources for your Apache server (in our case we increased it to 32 cloudlets). Then repeat the operations from the first point (i.e. find and compare the directive values you got with the ones from the previous step).
As a result of this comparison, you can conclude that parameter values increased automatically simply due to a higher amount of available resources allocated. Similar to this, upon stating a lower amount of resources, these parameters’ values will be reduced. That’s how the automatic optimization works.
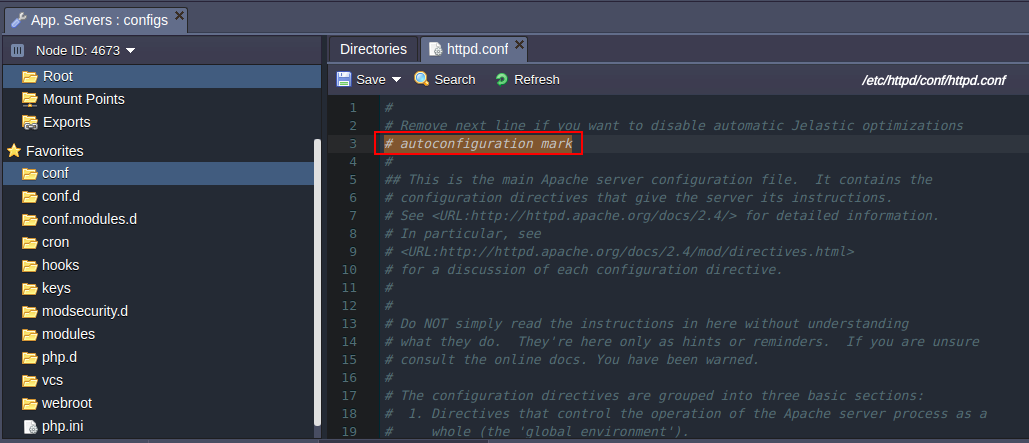
Disable Automatic CloudJiffy Optimization
To state the custom values for the automatically configured directives described above, first you’ll need to disable the automatic CloudJiffy optimization, in order not to lose the performed changes during the update.
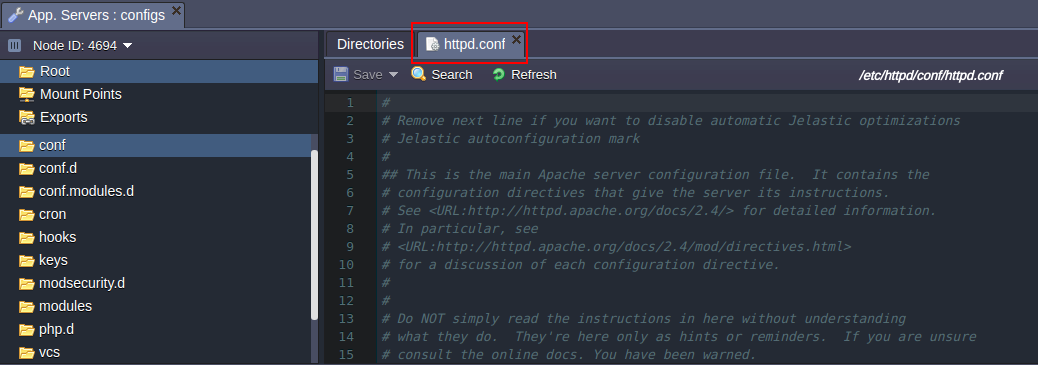
The process is almost the same for both PHP servers - you just need to remove the line with the CloudJiffy optimization mark at the beginning of the corresponding configuration file:
-
for Apache: # CloudJiffy autoconfiguration mark - inside the conf > httpd.conf file