Cloudjiffy Marketplace is a library of the most popular and requested applications, which are configured and optimized in the most beneficial way via the Cloudjiffy Packaging Standard. These packaged solutions can be installed automatically directly from the dashboard, skipping many steps of manual deployment and optimization.
I can access the Marketplace via the appropriate button at the top-left corner of the dashboard.
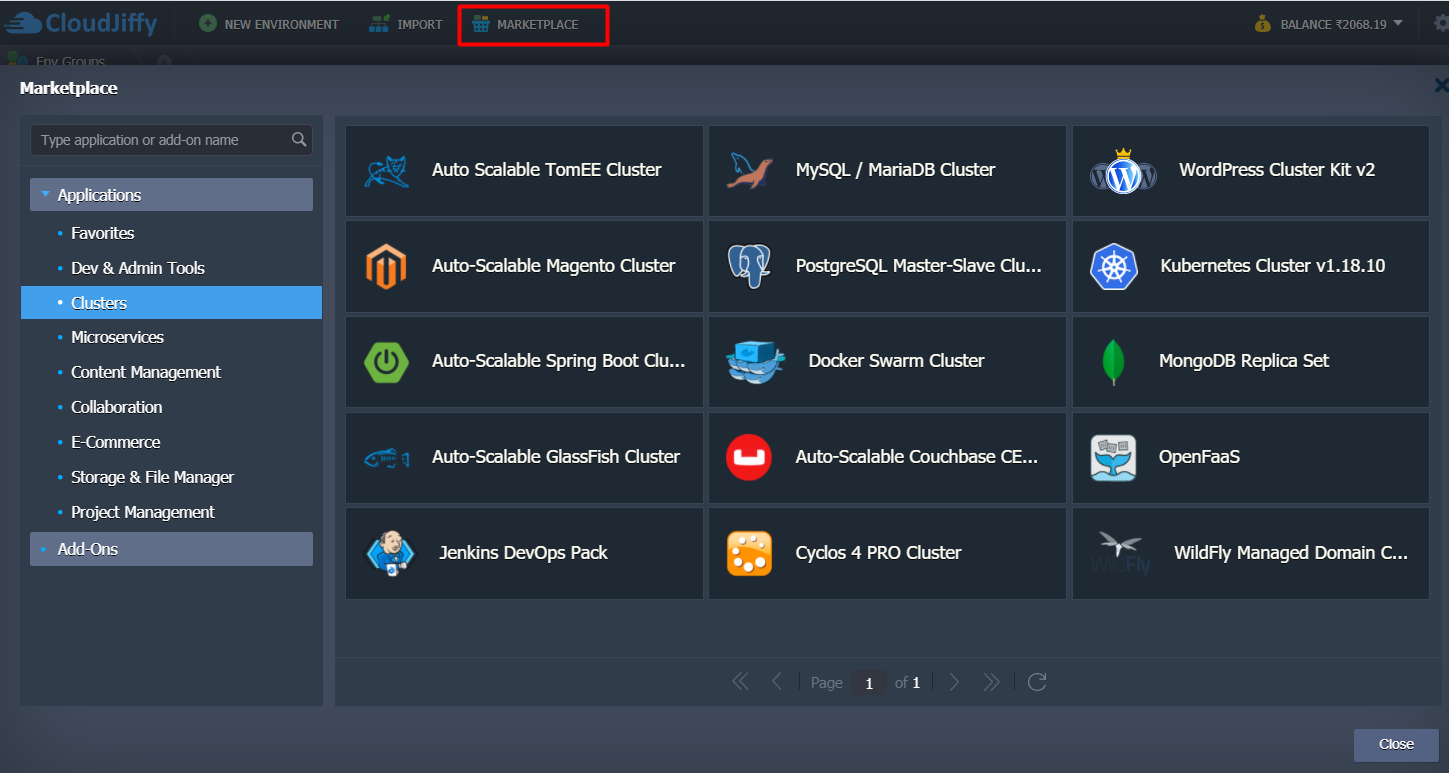
Within the opened section, I can find a list of categorized solutions to install new Applications from scratch and configuration Add-Ons to update my existing environments. Currently, Cloudjiffy manages and maintains the following JPS packages, providing them for one-click installation at all platforms:
| Applications | ||
|---|---|---|
|
|
|
| Add-Ons | ||
|---|---|---|
|
|
|
Note: The provisioned set of JPS packages can vary on each particular platform as it depends on the hosting provider settings.
For example, the HTTP/3 Premium CDN add-on is supported on the following Cloudjiffy PaaS installations only.
The Cloudjiffy team frequently implements new solutions to extend this list. The majority of such updates are highlighted within the Cloudjiffy blog, so if I are interested, I can subscribe to be notified about all of the new utilities.
Tip: For more solution examples refer to the Cloudjiffy JPS Collection on GitHub, where I can find multiple packages to be used with the platform:
- Enterprise WordPress Cluster for Auto Scaling, High Performance and High Availability
- Scalable MySQL Cluster with ProxySQL Load Balancer and Orchestrator
- Free Let’s Encrypt SSL Certificates Integration for the Most Popular Software Stacks
- Highly Available and Auto-Scalable Magento Cluster
- Cyclos - a Payment Platform for Large Businesses and Organisations
- Cron-Based Scheduler for Automatic Environment Hibernation
- Minio Cluster - S3 Compatible Object Storage
- Auto-Scalable Docker Engine and Docker Swarm Cluster
- Simple Automated CI/CD Pipeline for GitHub and GitLab Projects
- Java Memory Agent for Container RAM Usage Optimization
Import the appropriate manifest file via the dashboard to instantly get my solution. Also, I can explore the source code of any package, fork repository for myself and customize it up to my particular needs before installation.
Installing Solution from Marketplace
Below, we’ll provide an example of a packaged solution installation.
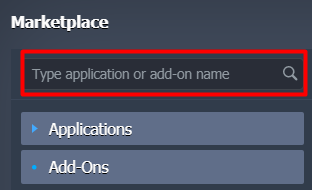
- To find a particular application, use a special Search box at the top-left corner of the Marketplace section. Type a phrase, and it will be looked for within solutions' names and descriptions (both for applications and add-ons).
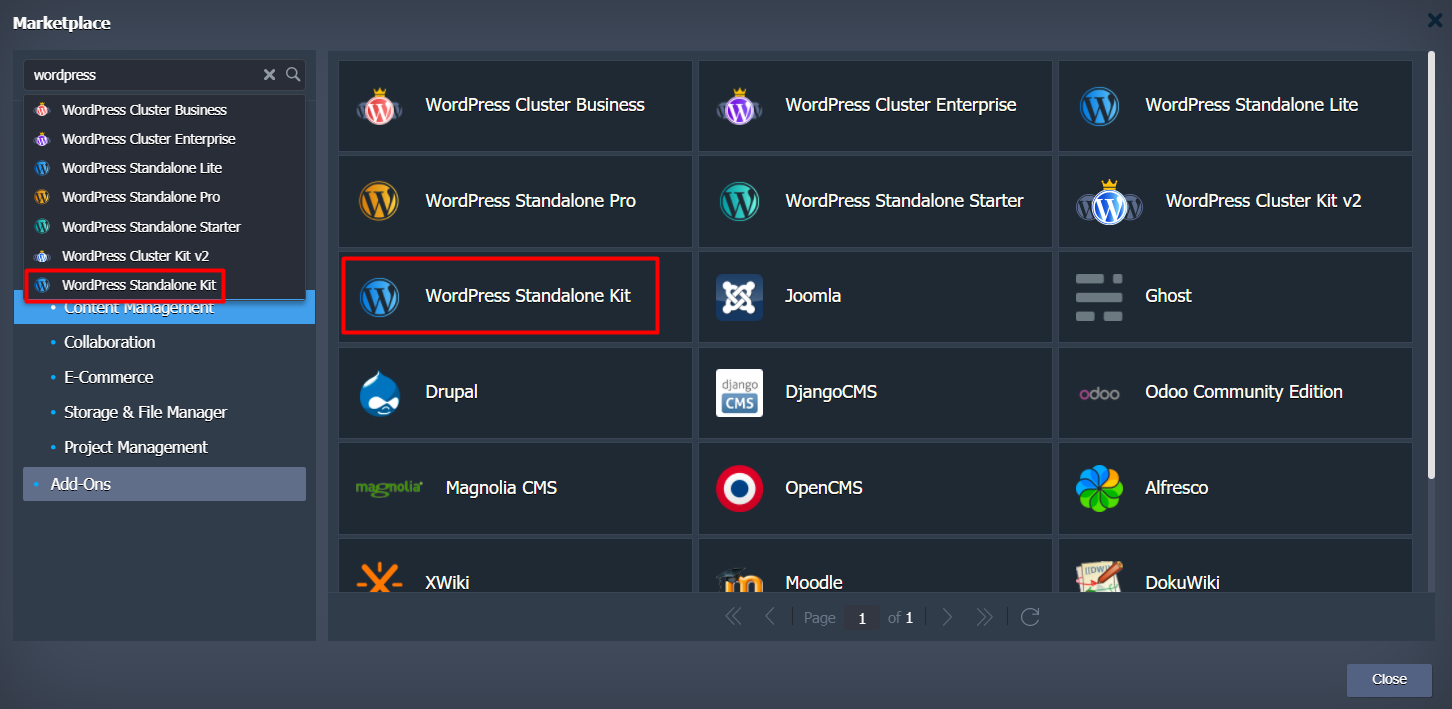
- We’ll use the WordPress Standalone Kit as an example. Select it from the proposed search results to instantly open the installation frame. Alternatively, I can locate the required solution manually within the categorized list (Content Management section in our case), hover over to unfold additional details, and click Install.
-
Based on the particular package, I may need to provide some additional data to customize the solution up to my needs. For example, it could be the preferable nodes count or specific option availability.
For a detailed overview of the WordPress Standalone Hosting peculiarities, refer to the linked article on our blog. In general, the basic settings (i.e. required by any application) are environment name, alias, and, if available, region.
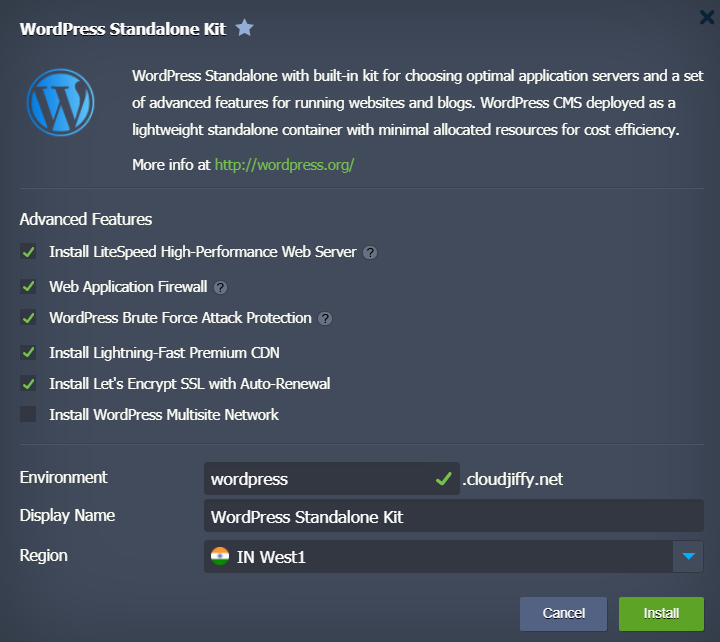
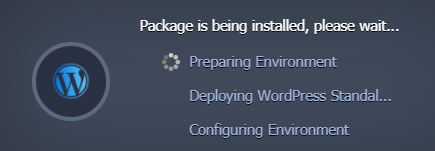
Click Install to continue. - The installation process may require up to several minutes, based on the selected solution.
- After all the required configurations, I’ll see a success frame. In our case, it additionally provides the corresponding administration data (which is also sent via the appropriate email notification).
Click the Open in Browser button.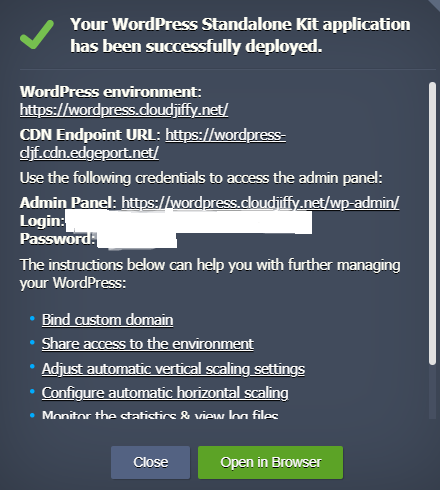
- I ready-to-work application will be opened in a new browser tab.

That’s all! Now, I can enjoy using my application.