This guide is intended to help with the smooth migration of WordPress websites to Cloudjiffy WordPress Cluster. Follow the simple steps to make migration flow painless and secure.
Note: This is a manual process.
Overview:
- Migration
- Install Litespeed Cache
- Redis Setup
- Troubleshooting
Migration
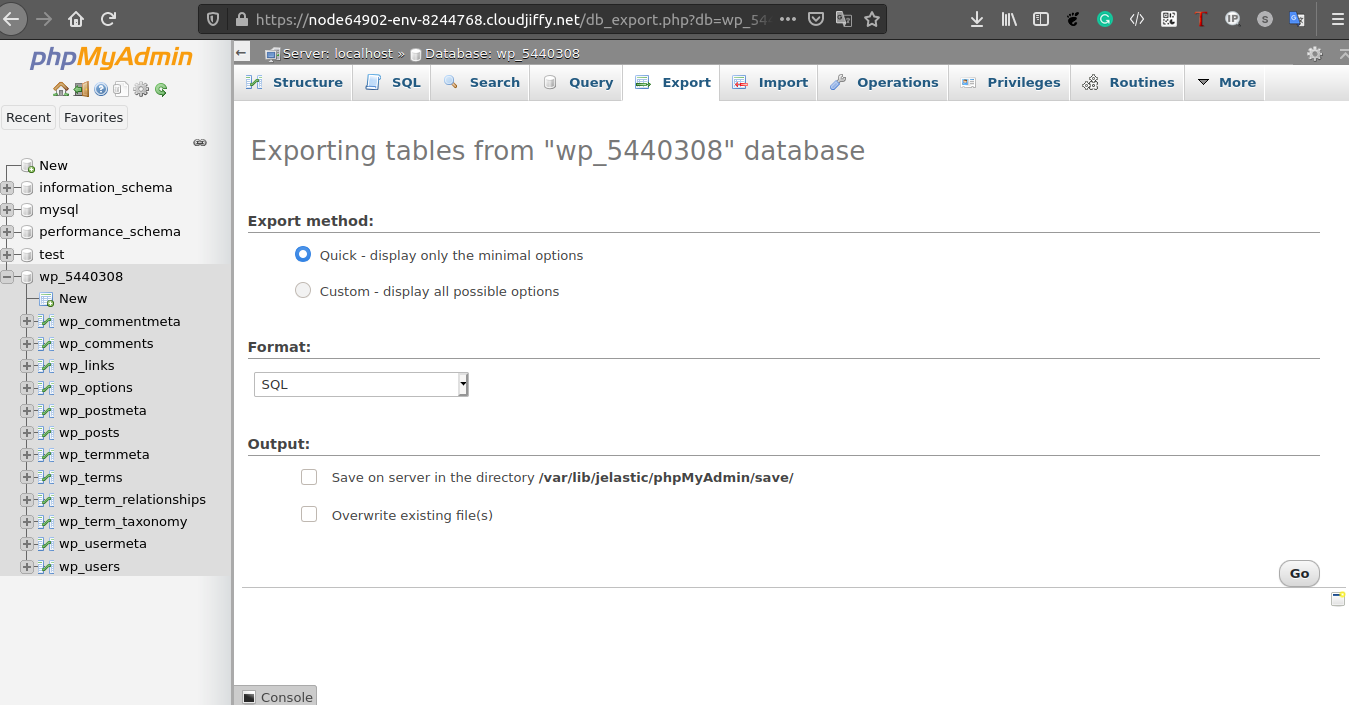
- You will need to backup all existing data from the old WordPress installation. For manual migration, you will need all files under the account's root (known as 'public_html' or document root). you need to compress the files to ZIP in order to transfer to cloudjiffy WordPress Cluster. You will also need the database file. you can download the database from the hosting panel. A well-known and widely database manager is PHPMyAdmin. From here, you can export the database in SQL or ZIP format.
- Once its ready with files, Create a WordPress Cluster Kit.
- Now you have to extract all my files in Application Node under /var/www/webroot/ROOT folder. For this, you have a couple of ways. you need to upload the zip first via FTP.
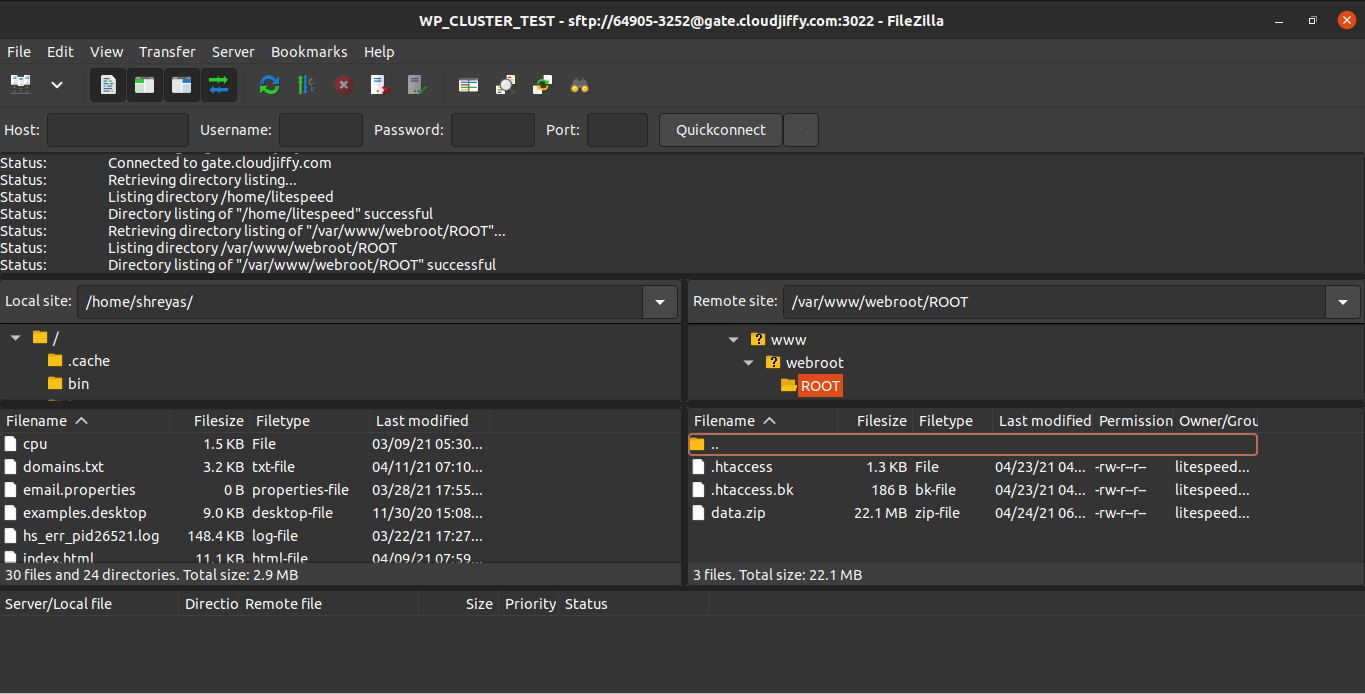
If you have access to your ZIP file via any URL You can download it to the Application Server via WebSSH.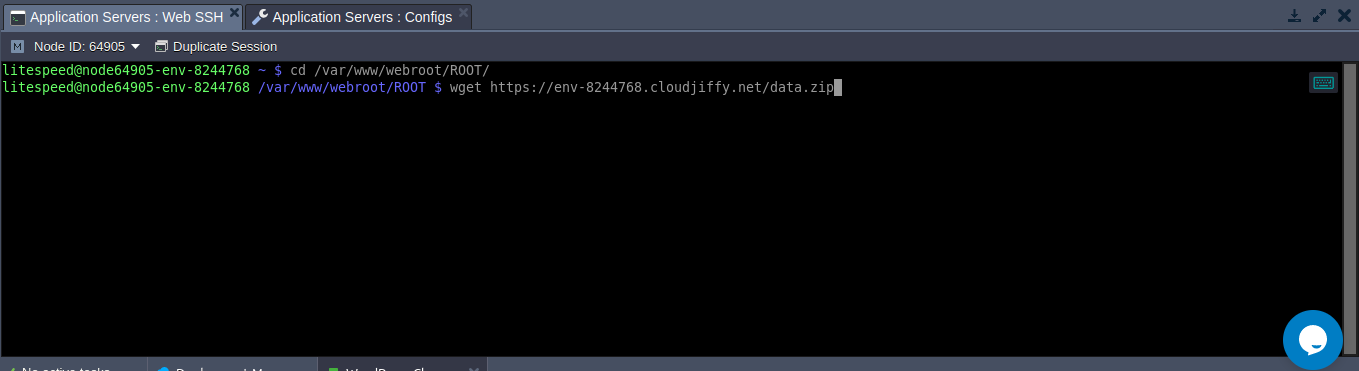
Once downloaded extract the files
#Change folder to where the ZIP is stored cd /var/www/webroot/ROOT #unzip data in the current directory. Change data.zip with the file name unzip data.zip
Note: The data you extracted may not be correctly placed under /data folder to move extracted files just use the mv command to move files and folder. - Now for Database upload access PHPMyAdmin. You should get login details for PHPMyAdmin via Email as soon as you install Cluster. Using those credentials log in to PHPMyAdmin. Here you can create, delete, upload a database.
You can upload to pre-existing and currently in use database for import my database. You can also create a new database. But if you created a new database you will need to update the wp-config.php file with the new Database name.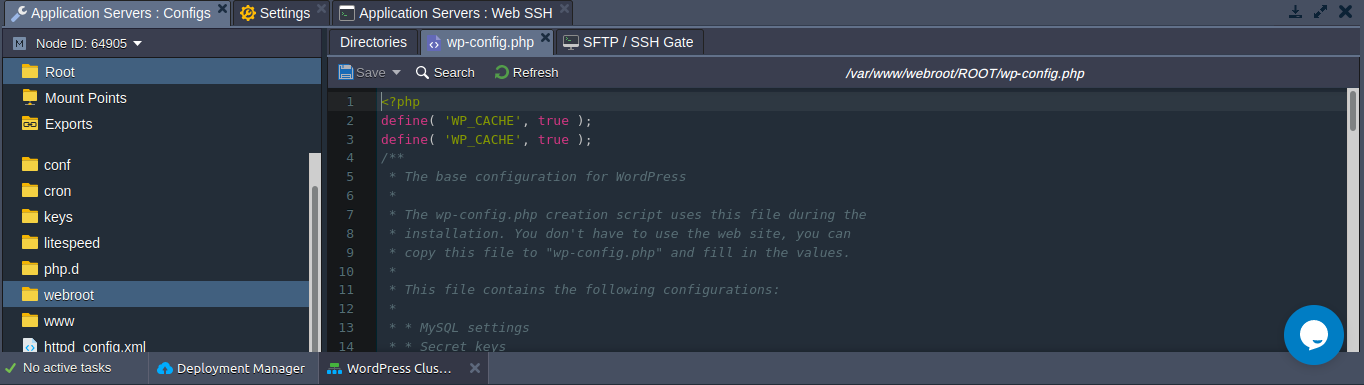
You can also upload SQL via FTP and put it in a folder /var/lib/jelastic/phpMyAdmin/upload/ mentioned in the image and then import it by selecting the file option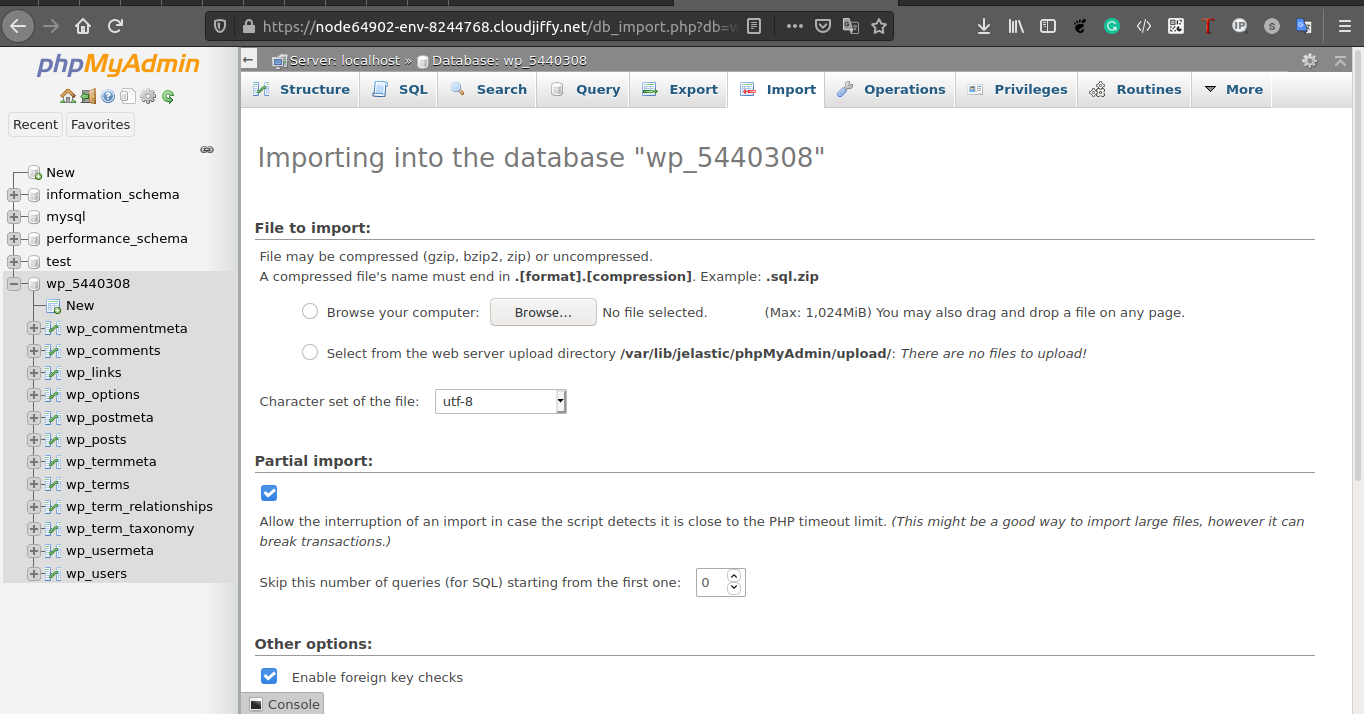
Also, you can import the database via command line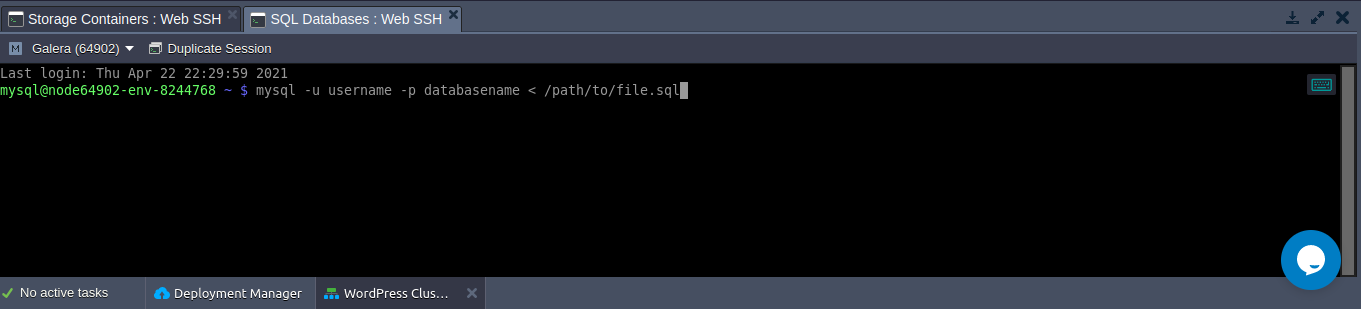
#below command will import the file.sql stored into database_name #make sure to set username database_name and correct path to file #Once you press enter, you will be prompted for a password mysql -u username -p database_name < /path/to/file.sql Enter Password:
Note: In WordPress Cluster, Galera Cluster is used which requires all tables having PRIMARY KEY defined. So check the database once if all databases have PRIMARY KEY or not. If it doesn't have one then you can simply add PRIMARY KEY to the database via PHPMyAdmin. - Make sure the wp-config.php has correct Database credentials in the wp-config.php file. As mention previously you can find credentials in the email.
- Now access WordPress and check if everything is working or not
Install Litespeed Cache
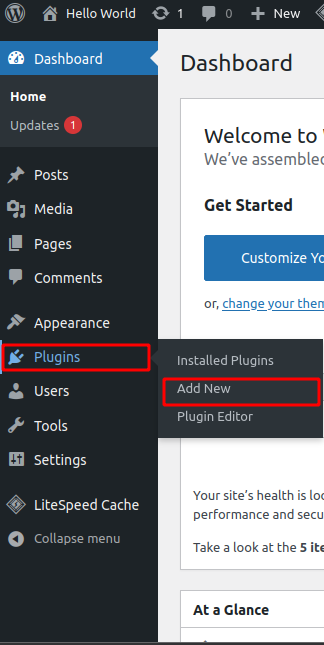
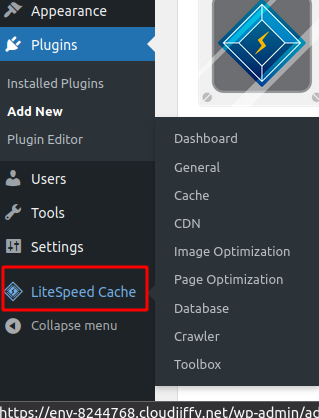
- To install the Litespeed cache (If not already installed) I need to install a plugin in WordPress
- Go to wp-admin > Plugins > Add new
- Search Litespeed Cache in the search bar
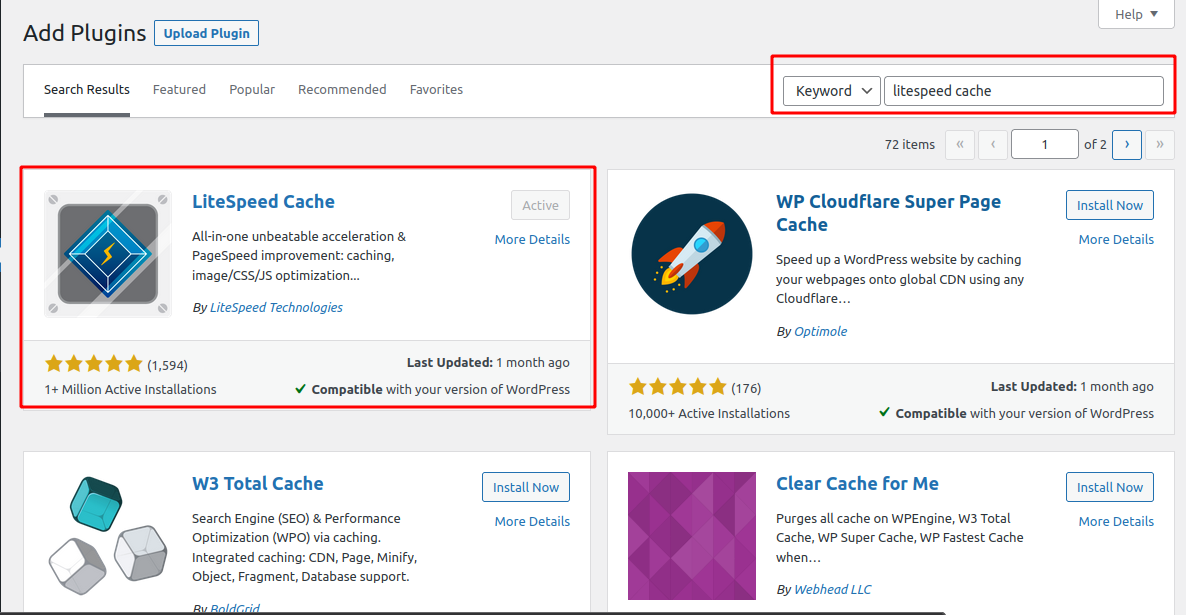
- Click on Install and once it is installed activate the plugin
Redis Setup
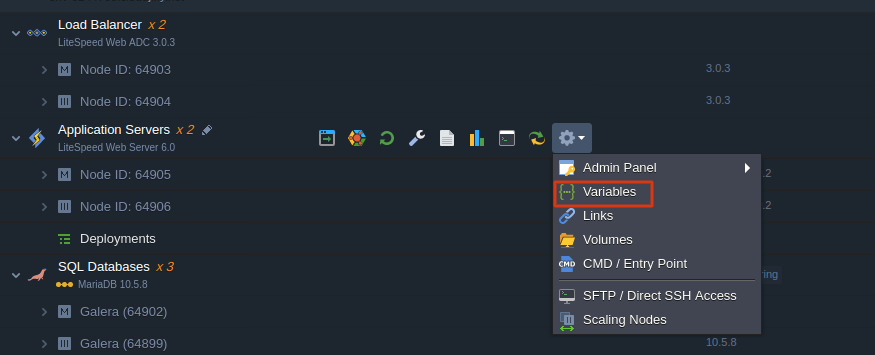
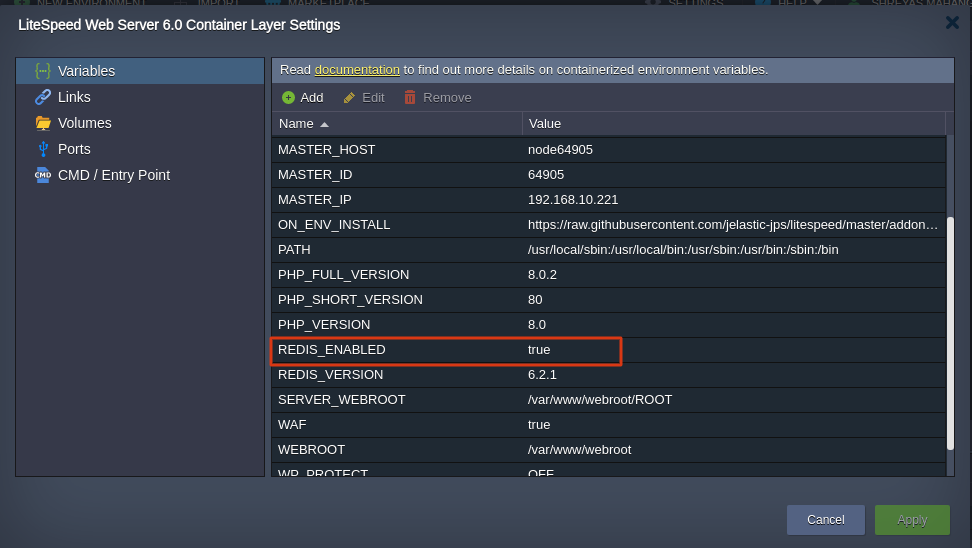
In WordPress Cluster, the Redis is configured by default. You can see it in the Variables section for more clarification.
To check Redis connectivity with the server, follow the below steps:
- Take SSH of web-server
- Run the command redis-cli
- Output: Could not connect to Redis at 127.0.0.1:6379: Connection refused
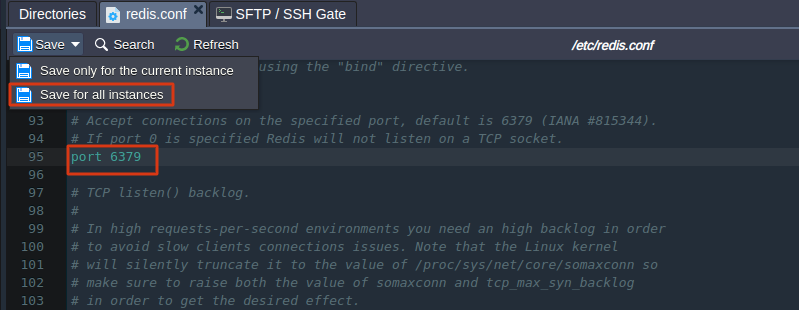
not connected> - Check the status of redis by 'service redis status'
- If it's running then need to check the port in the redis.conf file.
- The default port is 0. Change it to default redis port i.e. 6379
- Restart the web-server
- Now the o/p of redis-cli will be
127.0.0.1:6379>
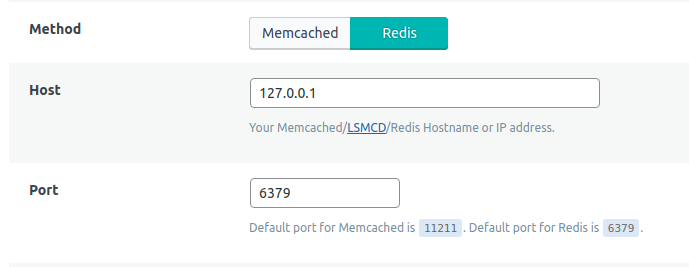
Also, need to configure Redis in wp-admin. For this, you can refer to the below steps:
- Login to wp-admin
- Go to Settings > Litespeed Cache > Object
- Add the Host and Port
Troubleshooting
- Access Denied:
- Take WebSSH access of storage node and run below command
chown -R 700:700 /data
- Take WebSSH access of storage node and run below command
- Wrong URL:
- I can set Home URL and Site URL in the wp-config.php file
- Or you can directly change Home URL and site URL in PHPMyadmin > the Database > wp-options
- Changes not reflecting:
- Go to WordPress > Litespeed Cache
- Clear All Cache (Or select appropriate action according to the needs)