The PHP website domain name is a front-page online property. The customers use it to access the site and it’s closely connected with the site’s brand. FYI, the words that make up a domain name are used by search engines to evaluate websites in search results.
It is a good idea to register multiple domain names that are similar to the website’s main domain name to protect the online brand. But that is not the only advantage of using multiple domains:
- Gives the ability to increase usability
- Efficiency and scalability of the PHP application
- Reduces the costs without having to set up separate instances
So, let's see how to run multiple domains on an Apache application server to make the PHP application even more scalable and effective.
1. Log in to CloudJiffy dashboard.
2. Click Create an environment at the top left corner of the dashboard.
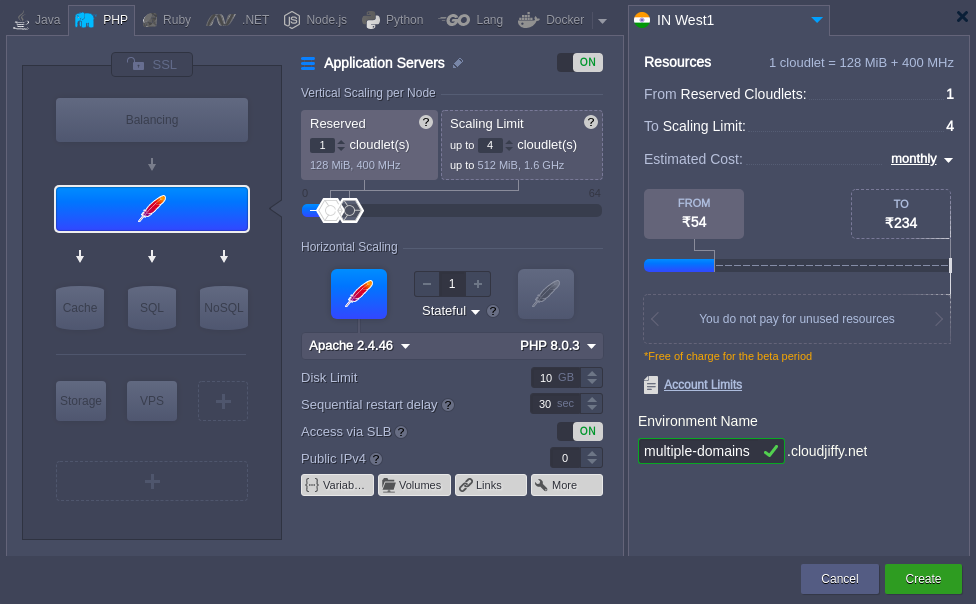
3. In the opened wizard navigate to PHP tab, pick application server and specify the number of resources that application needs. After that enter the name for the environment and click Create button.
4. In some seconds the environment will appear on the CloudJiffy dashboard.

5. You need to have the names in DNS, resolving to the IP address. So, buy domain names for the environment. It can be done in two ways: by adding CNAME record or by setting A Records.
6. After that click the Settings button for the environment and bind the domains. As an example, we use the following URLs: mydomain.com and myseconddomain.com.
Note: In this case, we put entries in our host's file for local testing and it will work only from the machine with those hosts entries.
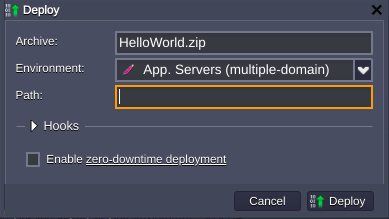
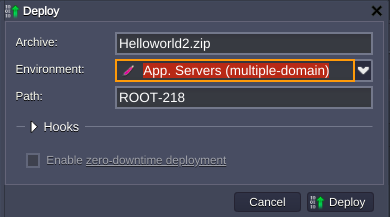
7. Now you can upload zip packages with the apps to the Deployment manager and deploy them to the environment you've created earlier.
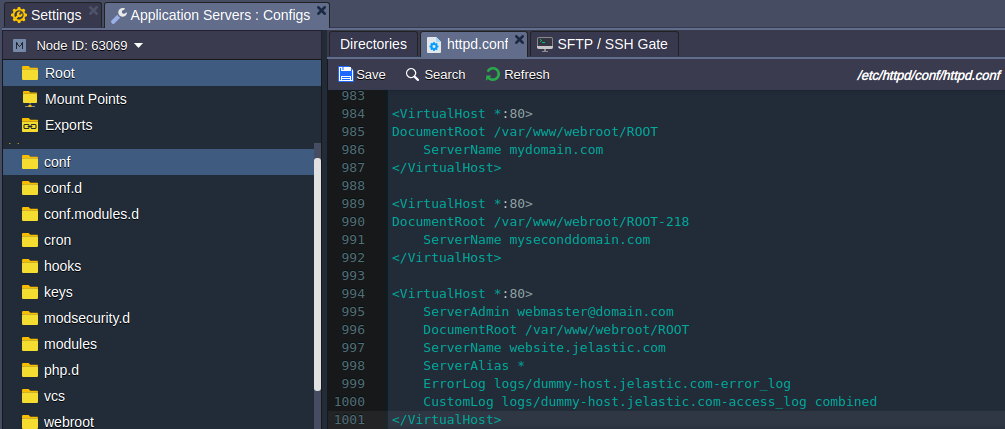
8. Once the applications are successfully deployed click the Config button for Apache and navigate to the httpd.conf file (conf directory) to specify the virtual host configurations
|
1
2
3
4
5
6
7
8
9
10
11
12
|
Listen 80
DocumentRoot /var/www/webroot/ROOT
ServerName mydomain.com
...
VirtualHost>
DocumentRoot /var/www/webroot/ROOT-218
ServerName myseconddomain.com
...
VirtualHost>
|
9. Save the changes and restart Apache in order to apply the new settings.
