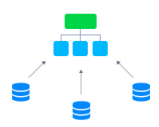
Mount points functionality is intended for managing connected to server data storage containers. At the same-named section of the inbuilt Configuration Manager, You can define the directories that are physically located on other, remote node(s), but should be accessible at a current container.
As storage for the data, any of the containers within the account (where the best option is Dedicated Storage Container) or external NFS server can be used. Herewith, upon choosing Cloudjiffy container, all of the needed configurations (i.e. installation of the dependent NFS software and setting export parameters for specified files) are applied automatically, without any manual manipulations required. This makes a great number of scenarios and possibilities for the advanced data structuration and control available.
Note:
- legacy containers, built on top of CentOS 5 template (i.e. created before the Cloudjiffy 2.0 version), do not support the data storage server/client functionality
- Docker containers, based on alpine or Ubuntu (under 14.04) OS distributions, can only be used as a data storage client due to the NFS server functionality being unsupported
So, in order to mount data to a container, click the Config button next to the chosen container or layer. In the opened Configuration Manager tab, switch to the Mount Points section within the menu to the left:
Then select the Mount button at the top pane and choose one of the following operation types (switch to the required doc below to get further details):
- Master Container
- Data Container
- External Server
Mount Master Container
The Master Container mount option is devoted to sharing content among the same-typed nodes of a single layer. Here, the initially created container, so-called “master node”, will handle the defined data for all other nodes on a layer.
Here, you need to specify:
- Mount Point - path to the folder on master container, that will be shared among all nodes of a layer (it will be also automatically used as a Remote Path on clients)
- Read Only - turn the switcher on to restrict the mounted data editing at client nodes (by default, the read & write rights are provided)
The rest of data will be fetched and substituted automatically, so just click Add.
Mount Data Container
- In the Add Mount Point frame, switch to the Data Container tab and fill in the required fields.
Here, the following parameters should be defined:
- Mount Point - path to the local folder the mounted content will be displayed at
- NFS Server - expandable list of nodes on your account which can be used as data storage container
- Remote path - the required directory location at a remote container (you can either type it manually or choose one of the favorite paths on that node from the automatically fetched drop-down list)
- Mount to all nodes - switcher to set the same mounts to be added for all nodes within a layer (including those that could be added further as a result of horizontal scaling)
- Read Only - turn the switcher on to restrict the mounted data editing at client nodes (by default, the read & write rights are provided)
Click Add to proceed.
Mount Data from External Server
Cloudjiffy allows you to mount data from outside of the Platform (i.e from the external NFS server - your custom one or container at another Jelastic installation) as simple as within its confines.
- Within the Add Mount Point section, switch to the External Server tab.
And specify the following data:
- Mount Point - path to the local folder the mounted content will be displayed at
- NFS Server - external IP of the data storage server or its custom domain name
- Remote path - exported files location on NFS server
- Mount to all nodes - switcher to set the same mounts to be added for all nodes within the layer
- Read Only - turn the switcher on to restrict the mounted data editing at client nodes (by default, the read & write rights are provided)
Confirm with the Add button.
Tips:
- mount points functionality is provided for all Cloudjiffy nodes; however, if operating with Docker-based containers, you can also use the volumes section to manage the mounts, where the additional option of local storing is available. In this case, the data will remain unaffected during the container’s lifecycle even being stored in the same container
- within the Exports section (one item down in the left-hand menu), you can manage the list of folders and review files, that are shared by the current server (i.e. data, other nodes have the access to)