Let’s Encrypt Add-on for Automatic SSL Configuration of your CloudJiffy Environment

Let’s Encrypt is a free and open Certificate Authority, that simplifies and automates processes of browser-trusted SSL certificates issuing and appliance. This is achieved by obtaining a browser-trusted SSL certificate from Let's Encrypt and attaching it to environment entry point (i.e. either compute node or load balancer). Upon integrating such certificate into your application, it will start supporting secure connection via the HTTPS protocol.
SSL Configuration with CloudJiffy Let’s Encrypt Add-On
This solution can be installed to any environment with one of the following CloudJiffy certified or dockerized containers as an entry point:
This solution can be installed to any environment with one of the following CloudJiffy certified or dockerized containers as an entry point:
- Load Balancers - NGINX, Apache LB, HAProxy, Varnish
- Java application servers - Tomcat 6/7/8/9, TomEE, GlassFish 3/4, Jetty 6
- PHP application servers - Apache PHP, NGINX PHP
- Ruby application servers - Apache Ruby, NGINX Ruby
This list is constantly extended to subsequently provide all software stacks support.
The Let’s Encrypt add-on allows to configure SSL for:
- internal environment address, which is composed of environment name and platform domain, to be served with a dummy (i.e. not commonly trusted) SSL certificate; this option can be used for testing purposes.
- external domain(s), each of which should be preliminarily bound to external IP of the corresponding node - either master application server instance or load balancer - via A Record or CNAME; provides trusted SSL certificates for production applications
To get deeper insights on how the Let’s Encrypt service works, refer to the official documentation.
How should you Install Let’s Encrypt Add-On to CloudJiffy Environment
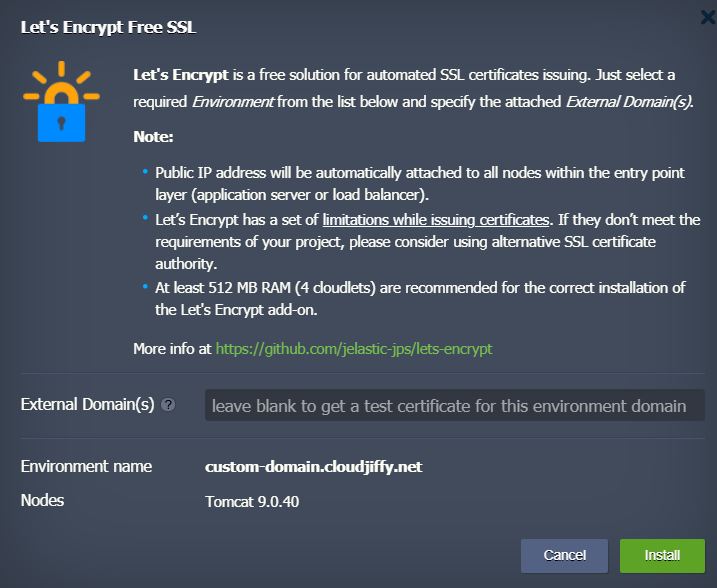
Click on the marketplace option from the platform. Click Add-ons or search from the Market place search to figure out the Let's Encrypt Free SSL and then click install.

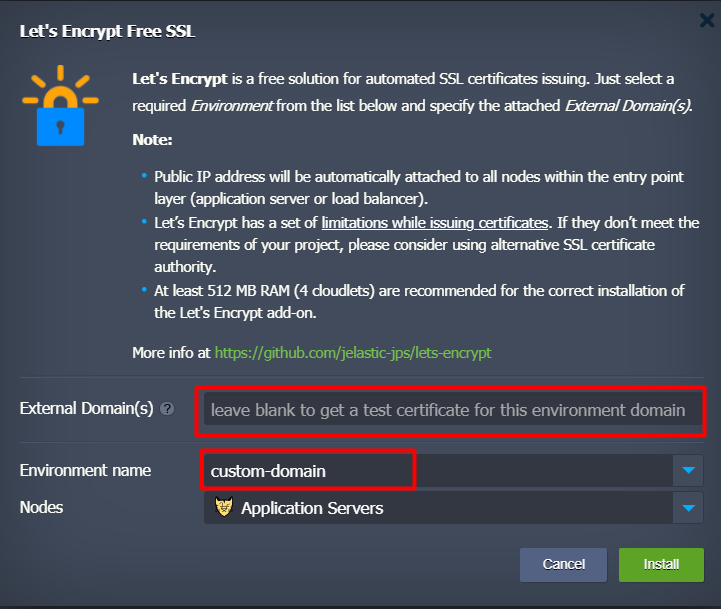
Select the desired environment and then the node and also enter the external domain name, then click install.

The other option to install the certificate is from the environment add-on option.


Here, you need to:
1. Provide External Domain(s) of the target environment. Here, the possible options are:
1. Provide External Domain(s) of the target environment. Here, the possible options are:
- leave the field blank to create a dummy SSL certificate, assigned to environment internal URL (env_name.{hoster_domain}), for being used in testing.
- insert the preliminary linked external domain(s) to get a trusted certificate for each of them; if specifying multiple hostnames, separate them with either comma, space or semicolon.
2. Select the corresponding Environment name within the expandable drop-down list
3. Leave the automatically chosen Nodes layer value unchanged - it defines a layer with your environment entry point
Finally, click on Install to initiate installation of the appropriate SSL certificate(s).
3. Leave the automatically chosen Nodes layer value unchanged - it defines a layer with your environment entry point
Finally, click on Install to initiate installation of the appropriate SSL certificate(s).
How should you Renew SSL Certificate
Your Let’s Encrypt SSL certificate(s) will remain valid for 90 days. After this period expires, they need to be renewed for the encryption to remain active.
Your Let’s Encrypt SSL certificate(s) will remain valid for 90 days. After this period expires, they need to be renewed for the encryption to remain active.
By default, the required updated SSL certificates are requested and applied automatically 30 days before expiration (You'll get the appropriate email notification). Such a checkup is performed once per day based on the appropriate cron job. If needed, the exact time can be specified through adjusting the corresponding "cronTime": "0 ${fn.random(1,6)} * * *" setting within this package manifest file.
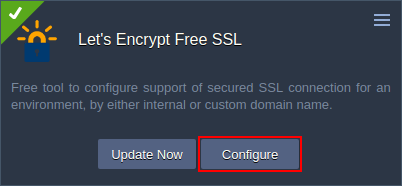
To renew certificate files manually, click the Add-ons button next to the appropriate environment layer and use the Update Now button within add-on’s panel.


Also, your SSL certificates can be updated by add-on re-installation for the same domain name(s). Herewith, adding new or specifying different domain name(s) during this procedure will cause the complete replacement of used certificates.
How Should you reconfigure SSL Certificate
In case of necessity, the already existing Let’s Encrypt add-on can be adjusted to match new requirements (i.e. to replace the currently used domain names with a list of new ones).

In case of necessity, the already existing Let’s Encrypt add-on can be adjusted to match new requirements (i.e. to replace the currently used domain names with a list of new ones).

Note: To avoid security issues, a new certificate will be issued, even in case of removing domain name(s) from the existing one.
Just click the Configure button within Let’s Encrypt panel and type domain name in the appeared pop up window.
If you intend to use a Public IP and an SSL certificate with the default environment URL, SLB should be disabled, and the SSL certificate should be installed via the Application Server Add-on.
If you prefer to use a Private IP, you have to enable SLB and the SSL certificate should be installed via built-in SSL.