1. Log into Cloudjiffy and create an environment with the MariaDB (or MySQL) database server (available within the SQL wizard section):
- for standalone database server

- for Auto-Clustering solution.

We’ve also added Tomcat node to provide an example of database connection from the application server.
2. Check the email inbox - it should contain a message with administration details for the created MariaDB (or MySQL) server.
In case of database cluster, the Entry Point for Connecting is referred to a ProxySQL load balancer.
3. Switch back to the dashboard and click the Open in Browser button for the MariaDB/MySQL node.
If I have you have cluster solution, press on Open in Browser next to the master database node (marked as M).
Log into the opened admin panel using credentials from the above-mentioned emails.
4. Use an existing database (e.g. test) or Create a new one.
5. Return to the dashboard and click the Config button next to the application server (Tomcat, in our case) to access the configuration file manager.

6. Navigate to the /opt/tomcat/webapps/ROOT/ folder, create a new mydb.cfg file.
For standalone database connection, add the following data in the mydb.cfg file:
| 1 2 3 4 | host=jdbc:mysql://{host}/{db_name} username={user} password={password} driver=com.mysql.jdbc.Driver |
All the required info can be found within the MariaDB/MySQL node email:
- {host} - link to the DB node without protocol part
- {db_name} - name of the database (test in our case)
- {user} and {password} - database admin credentials (for production usage, it’s recommended to create a dedicated account with the appropriate permissions)

For connection to the cluster, ProxySQL load balancer is used as the entry point, and each type of databases has its own connector. So add the following data to the mydb.cfg file:
For MariaDB:
| 1 2 3 4 | host=jdbc:mariadb://{hostname}/{db_name}?usePipelineAuth=false username={user} password={password} driver=org.mariadb.jdbc.Driver |
- {hostname} - link to the DB cluster load balancer (i.e. ProxySQL layer)
- {db_name} - name of the database. We chose test in the first step
- usePipelineAuth - if activated different queries are executed using pipeline (all queries are sent, only then all results are read), permitting faster connection creation. This value should be set to false, as such implementation doesn’t work with the ProxySQL in front of the cluster
- {user} and {password} - database credentials received in the email

In such a way, all connection settings are saved in a single file, which, subsequently, will be read by the application.
8. Deploy our example application to the Tomcat server using the following link:
https://download.jelastic.com/public.php?service=files&t=b2c6e4e01d487dfd5af953ba31dac848&download

Note:
- Our example application already contains the jdbc-connectors for MariaDB/MySQL database access. However, to connect my own project, that need to manually upload them to the webapps/{app_context}/WEB-INF/lib folder on the application server.
- Don’t forget to restart my application server to apply mydb.cfg changes, by pressing Restart Node button.

9. Once deployment is finished, click Open in Browser in popup window or next to my application server.

10. In the opened browser tab, click on the Create test table in the database button.

11. Now, in order to ensure everything works fine, return to the phpMyAdmin panel and navigate to the test database.
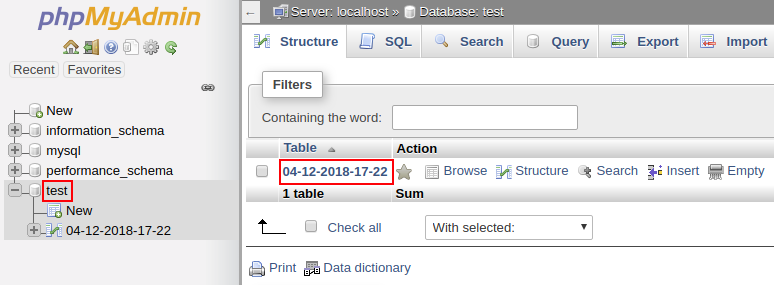
I’ll see that the newly created table appeared with the name {date-time of creation}, which means the DB has been successfully accessed and modified from the Java application. It’s that easy!