With CloudJiffy you can easily deploy your application from any remote public or private GIT/SVN repository for each of the supported programming languages: Java, PHP, Ruby, Python and Node.js.
In order to achieve more security, you can also access your private GIT repositories via SSH and easily clone and update your applications from them. In addition, this gives you an ability to work with those repositories, which are located at the private servers, instead of common web-based hosting services for projects like GitHub, Bitbucket etc.

For accessing your private GIT repository using the secured SSH protocol, follow the simple steps below.
Generate a SSH Keychain
To start with, you need to create a SSH keypair (i.e. two related keys: private and public) for binding your GIT repository to the CloudJiffy account. Follow this instruction if you’ve never generated a keychain before.
Add Private SSH Key to CloudJiffy Account
Once you’ve got a pair of generated SSH keys, let’s place each of them to the appropriate systems. First of all, you need to add your private key to the CloudJiffy account.
1. Log in to your CloudJiffy account and navigate to its settings by means of clicking the same-named Settings button at the top-right section of the dashboard.
![]()
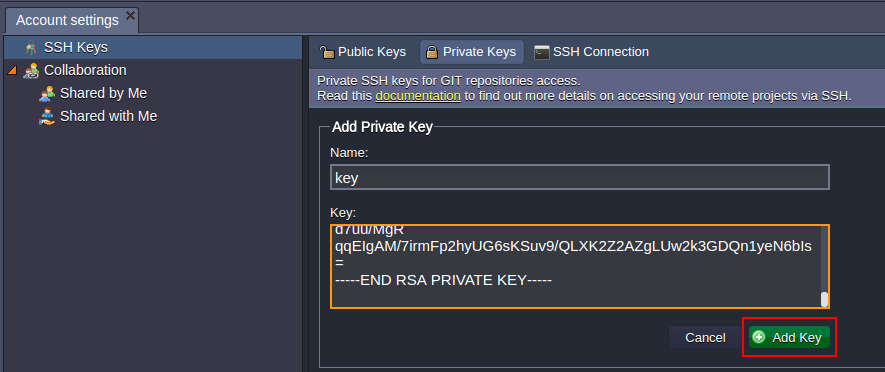
2. Within the opened Account Settings tab, switch to the Private option inside the SSH Keychain section and click on the Add Private Key button.

3. Copy your private SSH key and paste it to the Key text field. Then type a name for this key within the field above (e.g. git-key) and finish the addition with the Add Key button.

|
Note: If you’ve received an error while adding the key, make sure it is not protected with a passphrase. Otherwise, remove the protection and try again. |
4. As a result, your new private key will appear in the corresponding tab in just a moment.

You are always able to delete your keys from a key manager by selecting the appropriate red cross button, if they aren’t needed anymore. Herewith, key’s deletion from the list won’t remove it from the GIT projects this key was used for, therefore you will be able to work with them in the same way as it was done before.