-
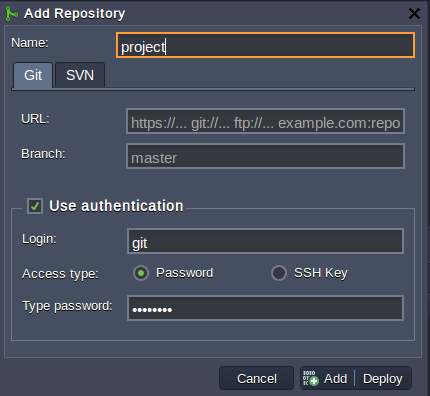
for Git
-
URL to the project (http, https, git orftp link)
-
Branch of the project
-
Path (environment context name of project will be deployed to)
-
-
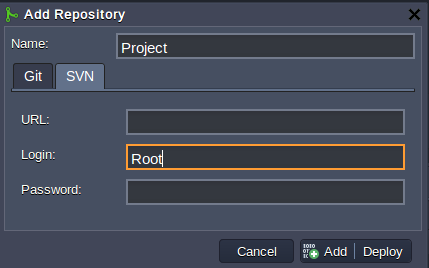
for SVN
-
URL to the project (http, https or svn link)
-
Login and Password of the repository (if this is required)
-
Path (environment context name of the project will be deployed to)
-
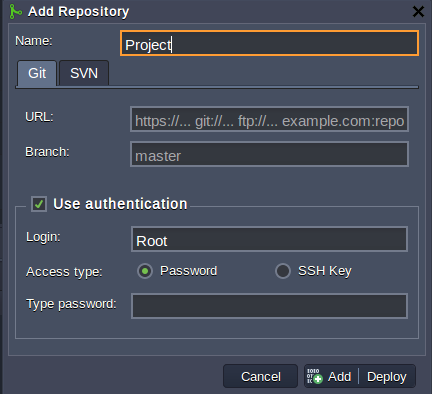
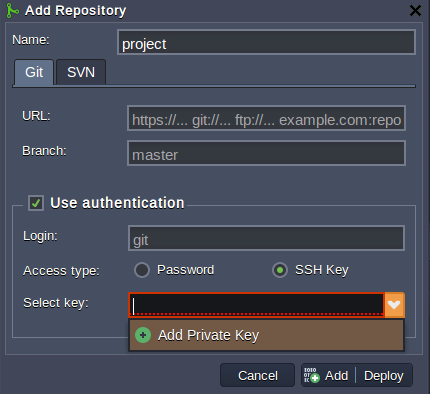
3. In case the Git repository I would like to access is private, put a tick to the Use authenticationcheckbox. I’ll see an additional section expanded, where I can enter the authentication data.
-
enter the Git account credentials (Login and Password) for the Password access type
-
type the Git account Login and choose the appropriate private SSH key from the Select key drop-down list for the SSH key access type (more details on SSH authorization for GIT see here
-
Ticking the Check and auto-deploy updates checkbox will enable an automatic periodic re-deployment of the project from the repository, which is only performed if the repository contains new code changes. Use the Check every (min) option to define the required frequency of the project’s updates.
-
The Checkout now option (ticked by default) is used to indicate whether I’d like to deploy the project just after its addition or to do this later. If this option is disabled, the repository’s configurations will be saved for a further deployment, which can be initiated by the auto-deploy feature (if it is enabled) or by selecting the Update from the GIT button next to the added project.
-
The active by default Auto resolve conflict option represents an analog of the git reset –hard command. It is used to prevent the occurrence of merge conflicts while a further project update, which can take place if the same file was modified in both remote repository and the project, hosted at CloudJiffy Cloud. If such an issue arises, this contradictory file will be updated according to its repository version (which is considered as the correct one), discarding the locally made changes.
Note: Please DO NOT disable this option if I don’t know exactly what I am doing.
-
Finally, select Add at the bottom of the frame.