
As a critical component for most applications, data has to be available for end users in a dynamically changing environment. Storing data in one location is a subject to risk in case of a system failure. Therefore, I need to come up with a strategy on how to ensure high availability and one of the solutions is to maintain the data on multiple synchronized servers.
Having my data replicated from one database to another allows to alleviate system failures, improve productivity, run backup services, and analyze data with no performance degrade.
Among numerous database clustering solutions, Cloudjiffy provides PostgreSQL with master-slave asynchronous replication based on the certified templates. By default, it deploys two database containers (one per role - master and slave).
The primary (master) server runs an active instance of the database and accepts read-write operations, whilst the standby (slave) server runs a copy of the active database and handles read-only operations. Therefore, if the primary database fails due to container failure or database corruption, the slave server (running in a separate container) has to be promoted to the master retaining the writes to ensure database availability.
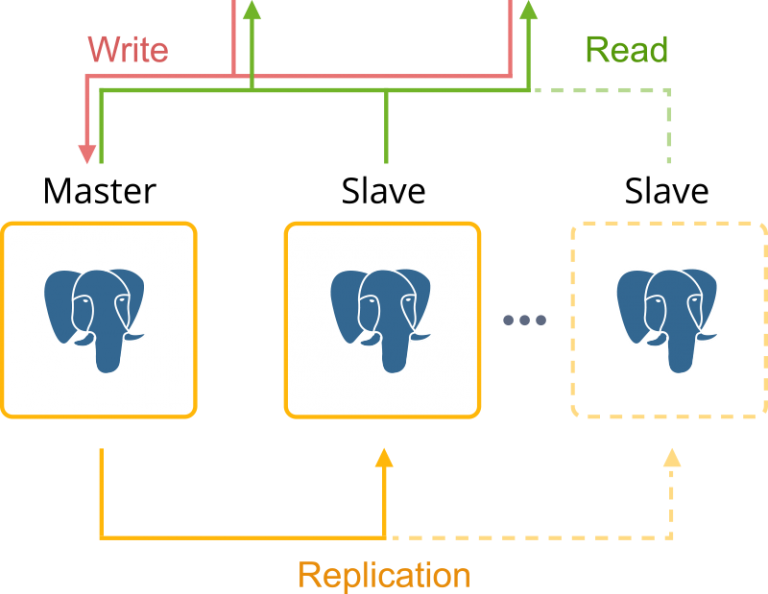
Within the cluster topology, each database container has a default vertical scaling from 2 reserved to 32 dynamic cloudlets (up to 4 GiB of RAM and 12.8 GHz of CPU) that are allocated dynamically based on the incoming load. Subsequently, I can change the resource allocation limit by following the above-linked guide.
Database Cluster can be installed automatically:
- As a Marketplace application
- Via embedded Auto-Clustering feature at the Dashboard
Within this tutorial, we will cover both.
PostgreSQL Cluster Installation from Marketplace
PostgreSQL Master-Slave Cluster package can be easily found in the Marketplace.

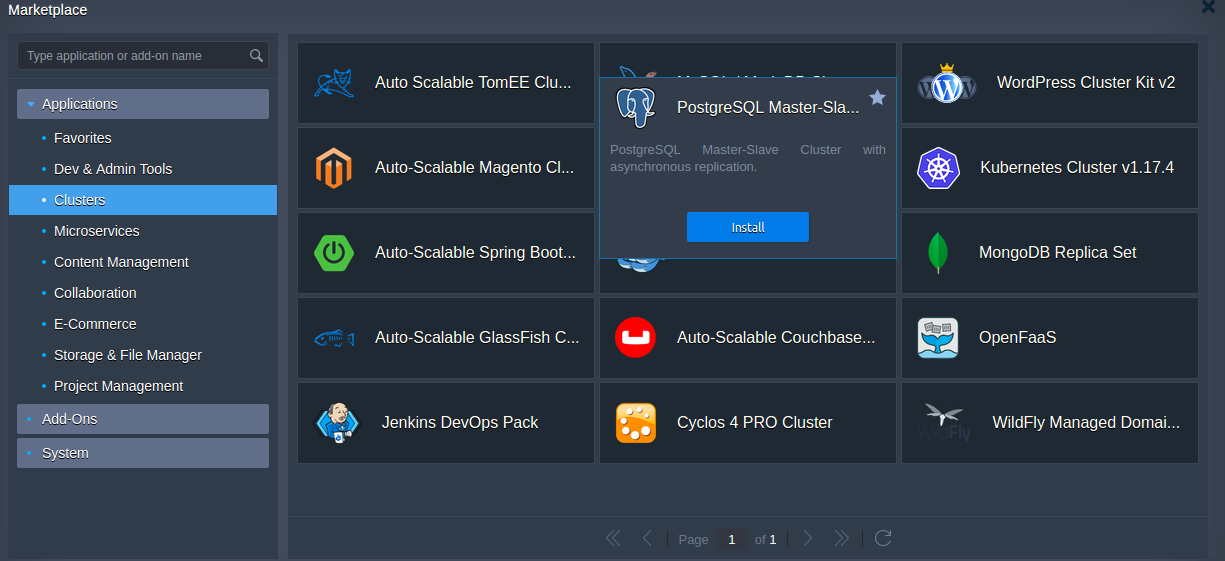
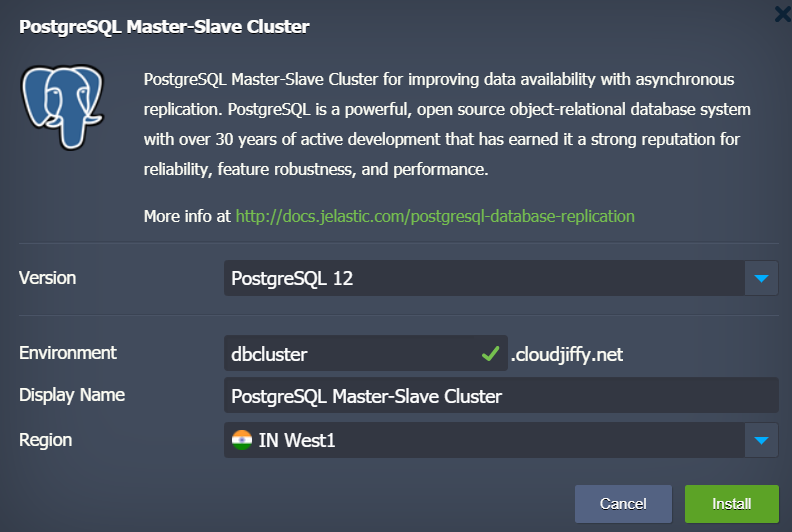
If required change database Version, Environment name and destination Region in the installation window.
PostgreSQL Auto-Clustering Mode
In Cloudjiffy, auto-clustering is enabled by a specially designed switch that makes clustering easier than ever before. To do this just invoke the topology wizard at the dashboard, pick the software stack(e.g. PostgreSQL 12.3) and slide the Auto-Clustering switch to the right.
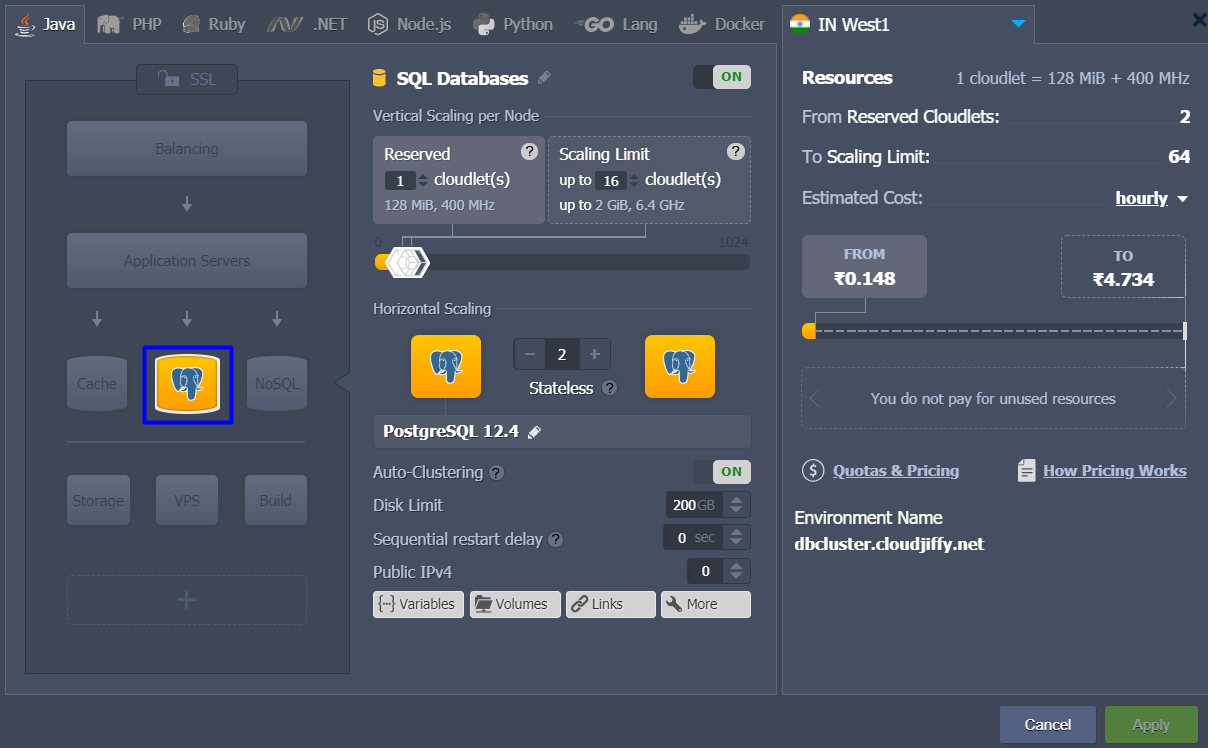
Change the destination region if necessary.
Tip: The PostgreSQL Replication package sources are available within Cloudjiffy JPS Collection alongside with other useful solutions, any of which can be integrated through importing a manifest.yaml or manifest.jps file from the appropriate repository.
Cluster Topology
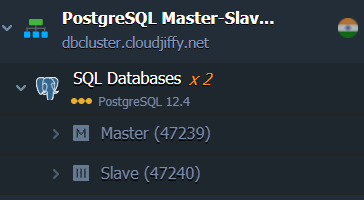
Database cluster topology obtained upon both deployments looks like as follows:
When the database cluster installation is completed, I’ll see a confirmation message with master node URL and database access credentials. All this information is duplicated via email.
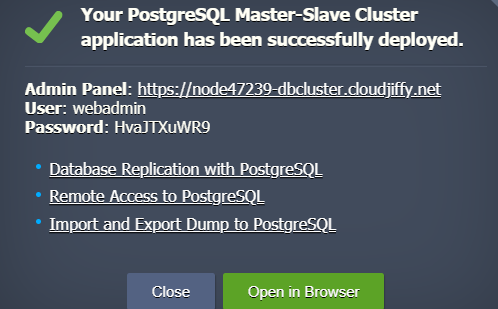
Note: If the cluster was installed with auto-clustering functionality the credentials are sent via email only.
Now, let’s put the master database into action to check that data is successfully replicated to the slave.
Testing PostgreSQL Database Replication
To ensure that data is replicated properly, we’ll create a new DB instance in the master container and check its presence inside the slave.
Create a New Database
- Click Open in Browser next to the PostgreSQL Master node to launch the phpPgAdmin web interface.

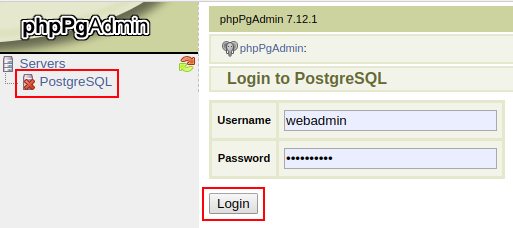
- Under Servers, click PostgreSQL and log in with credentials I’ve obtained upon cluster installation.
- Click Create database.
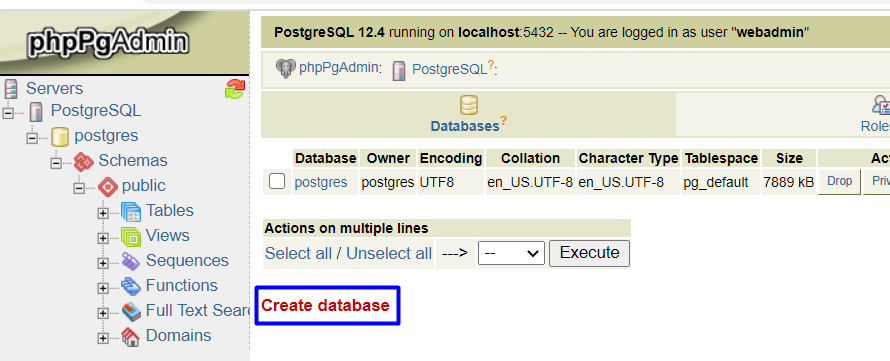
- Fill in the Name box (e.g. Cloudjiffy), and click Create.
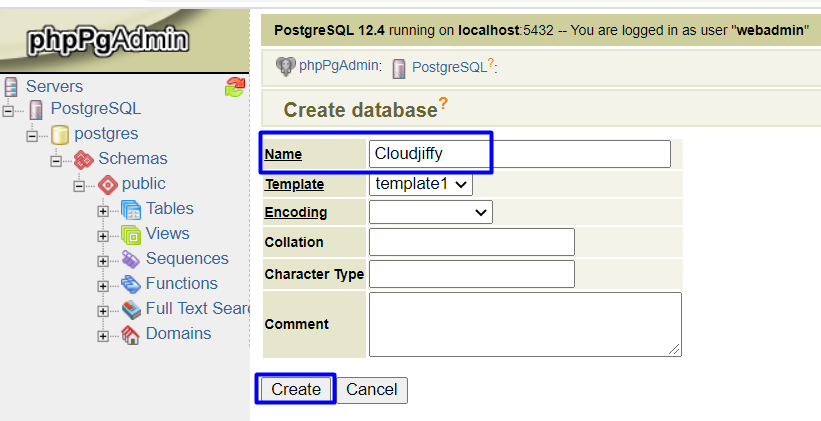
Now, when the database is created in the master node, let’s check the replicated data within the slave one.
Check the Replication
To make sure that data replication from the master to the slave database node works as intended, perform the following steps.
- Click Open in Browser next to the PostgreSQL Slave node to launch the phpPgAdmin web interface.

- Access admin interface with the same username and password that I’ve used to access the master node.

Once logged in, I can see the replicated database (Cloudjiffy, in our example).
That’s it! The PostgreSQL environment with master-slave asynchronous replication is up and ready for data processing.
As a next step, I can connect this PostgreSQL replicated database to my project. The process depends on application specifics, so follow the instructions below for:
- Java application
- PHP application
- PostgreSQL Replication Configuration
Try out by myself how easy it can be to handle multiple copies of essential data within replicated PostgreSQL databases with no need to make manual configurations. Register at one of Cloudjiffy cloud hosting providers and get a free account for testing.