Dedicated Storage Container

- being delivered with the corresponding software (i.e. NFS & RPC) already pre-installed, so such a container can be used as a storage immediately after the creation without any additional configurations required
-
compared to other common-purposed Cloudjiffy nodes, Dedicated Storage Container provides the enlarged amount of disk space, which allows persisting a comparatively bigger data volumes (herewith, the particular value depends on the service provider’s settings and can vary according to my account type).
Some tips on this container type usage and examples it can be leveraged in the best way are revealed within the corresponding use case description.
And below we’ll consider how to set up such Storage server inside the Cloud and some tips on its management:- Storage container creation
- Storage container management
Storage Container Creation
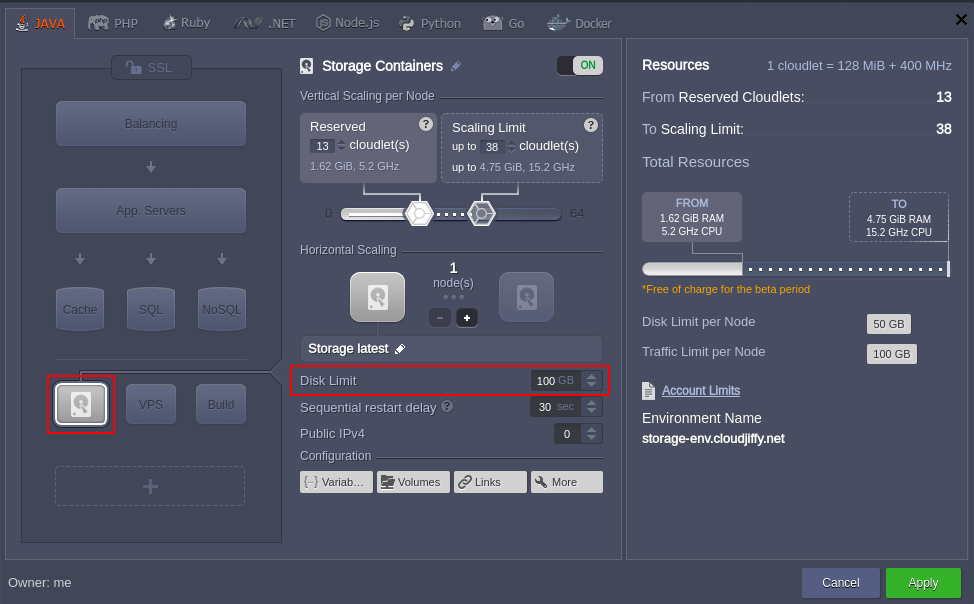
So, in order to create a new Dedicated Storage Container (either for a new or the already existing environment), just enable the corresponding Storage section at the topology wizard. This option is available for all engines including Docker containers.

The exact amount of provided storage space will be shown in the middle part of the wizard next to the Storage limit string. If its current value is not enough for me, please contact your hosting provider’s support team and request the corresponding account limit enlargement.
- it can’t be scaled horizontally, as there is no point in such operation
- the vertical scaling section is not disabled, as my storage will work over a network, that presupposes usage of RAM & CPU (the particular amount depends on load)
- this node’s exact pricing mainly depends on the amount of actually used disk space (but not on its limit) and external network traffic. I can check my provider’s costs for these resources within the Quotas & Pricing > Pricing > Disk Space (or Traffic) information frame
Right after container’s creation, I can immediately proceed to its configuration. Below, we’ll show several basic actions that may be useful for me to get started:
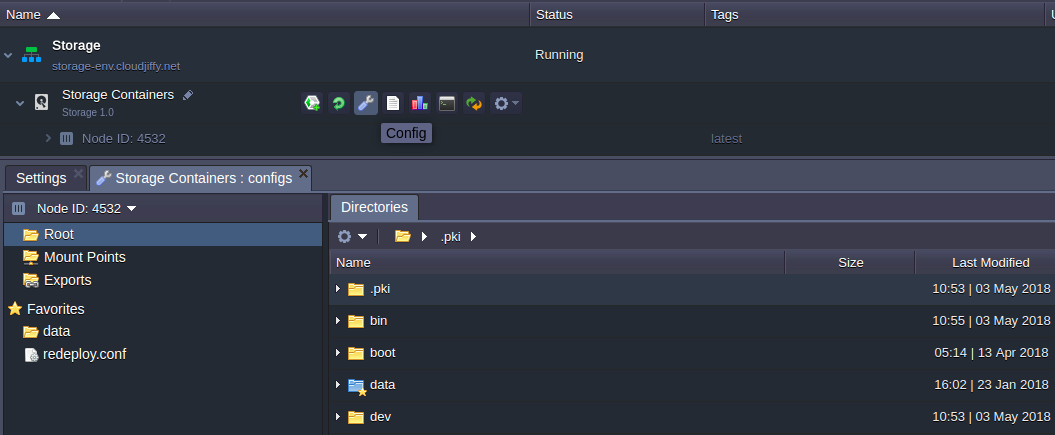
1. For the most of the common operations with the storage, the inbuilt configuration manager can be used. For example, its Root part gives access to the container’s file system.

Tip: Additionally, with the Mount Points and Exports sections below, I can:
- mount data from other Cloudjiffy nodes and external servers
- review the list of exported from the current node files and folders
2. For more complex operations, SSH access may be required, where I get full control over my storage server via a console.

3. If I want to use my Dedicated Storage Container as an external server (i.e. not only within the current Cloudjiffy installation) - just enable the Public IP option to make it accessible from outside and proceed with the dedicated NFS server configurations instruction.
Herewith, the attached to a node external IP address can be checked through the Additionally list of the corresponding string:

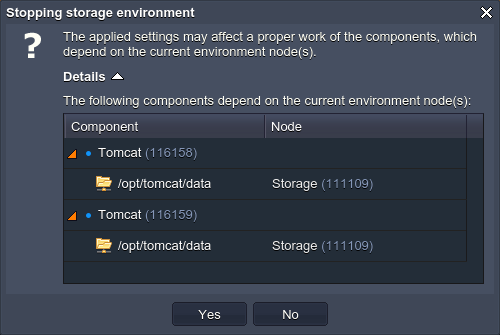
4. In case I’ll try to stop my environment with storage, the corresponding notification will inform me, that all of the dependent mount points on other nodes will stop to respond (whilst being automatically restored once the environment is started again).
